An advanced ATOM terminal interface. Fork of awesome atom package - terminal-panel


atom-terminal-panel
(a fork of super-awesome atom package - thedaniel/terminal-panel) Plugin for ATOM Editor.
Short note
This project uses jquery-autocomplete-js for autocompletion.
Development
This project is in alpha stage. Please contribute this project if you liked it. All the help is welcome. Thank you.
Usage
Just press shift-enter or just Ctrl + ` (control + backtick) and enjoy your cool ATOM terminal 😄
Try pressing the ctrl in the terminal for dynamic suggestions list!
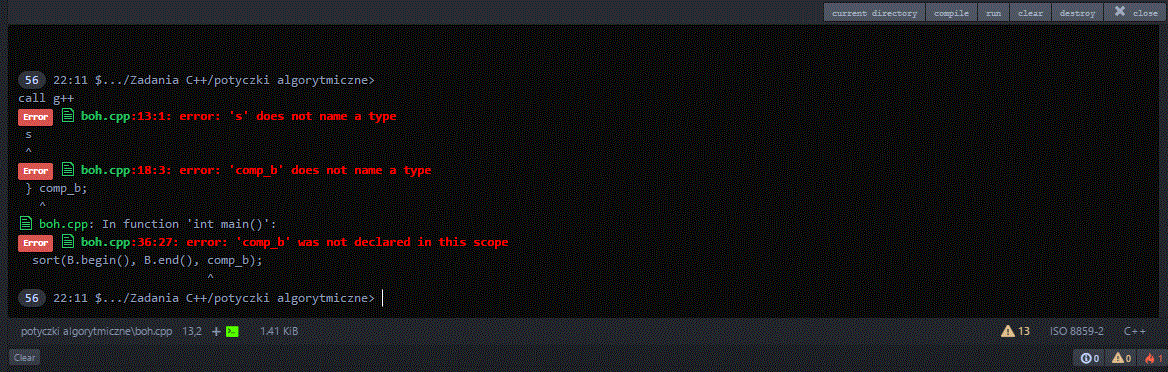
Screenshot
Terminal with fancy file links and interactive interface.
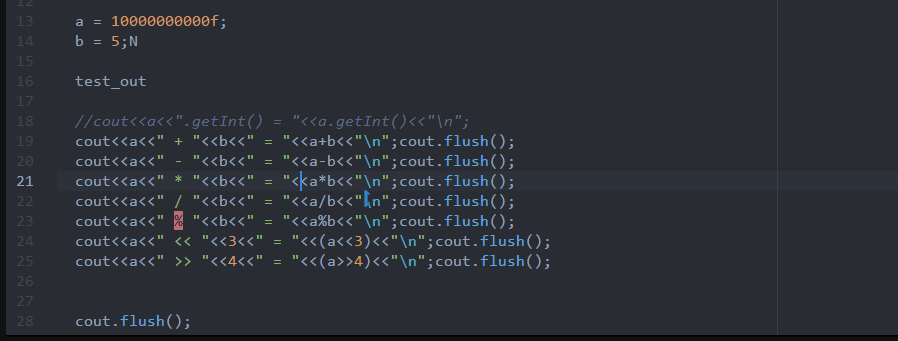
Fancy custom highlighting rules.
There's also nice looking easy-to-use command finder dialog (just to search your custom commands and terminal build-ins):
Feature
- multiple terminal
- colorful status icon
- kill long live process
- fancy ls (with custom extension colouring!)
- Do you wanna have a blue or a green executables? Do the yellow shell scripts look nice?
- file and directory links (auto path detection)
- interactive content (tooltips and on-click-actions)
- highlighting rules (define your own highlight options - supports awesome stuff like regex matching, replacement and link creation)
- nice looking slide animation on terminal open
- navigate command history using arrow keys
- Just like in normal, native terminal.
- search your favourite commands and built-ins
- Just type
?, easy right?)
- Just type
- many useful special variables (like path to the currenly edited file)
- customize your command prompt like never before using text formatting annotation and special variables!
- Do you want a current time, computer name or a cwd in your command prompt? There's no problem.
- easily create custom commands!
- You don't have to play with dirty shell script files!
- easily add new buttons to the terminal toolbar
- Now you can quickly access your command just by pressing one button
- auto suggestions and commands descriptions for ease of use
- modular commands system
- To add new commands just write your own /or download existing plugin!
- And copy it to the ./commands directory! - Easy, right?
And a lot more! See it by yourself!
Plugins
This ATOM plugin is modular. You can create your own commands or download existing from the other users. The release contains also the built-in plugins (for file system management etc.).
Terminal-commands.json
The terminal-commands.json is the main configuration file for this package. If it's not present (or the JSON syntax is invalid) a new config file is created (in folder .atom).
The config file contains:
- custom commands definitions
- rules (defininig highlights, regex replacement for text etc.)
The sample config file can look like:
{
  "commands": {
    "hello": {
      "description": "Some description",
      "command": [
        "echo Hello world :D",
        "echo This = %(*)",
        "echo is",
        "echo example usage",
        "echo of the console"
      ]
    }
  },
  "toolbar": [],
  "rules": {
    "warning: (.*)" : {
      "match": {
        "matchLine": "true"
      },
      "css": {
        "color": "yellow"
      }
    }
  }
}
The above configuration file will create highlight rule for all lines containing "warning: " text (this lines will be colored yellow).
Creating custom terminal shortcuts
You can create your own shortcuts buttons, which are placed on the terminal toolbar.
To do it just put a new entry in the toolbar property:
toolbar: [
  ["SHORTCUT NAME", "COMMAND TO BE EXECUTED"]
]
E.g. creating a button, which displays all avaliable terminal bultin commands:
toolbar: [
  [ "Display all commands", "memdump" ]
]
Another example. Now the button will move the terminal to the C: directory:
toolbar: [
  ["C:", "cd C:\\"]
]
You can add also tooltips describing the button functions:
toolbar: [
  ["C:", "cd C:\\", "Moves the terminal to the C:\\ directory."]
]
And now creating custom actions:
"actions": [
	[
    "test",
    "hello_world"
  ]
]
Actions allows you to run your commands as atom commands or bind them to the specified keys.
From the moment of the terminal initialization a new atom command is created - atom-terminal-panel:test,
which will execute the hello_world command in the terminal.
You can now bind the command to the specified keys by editing your keymap.cson:
'.workspace':
  'alt-t': 'atom-terminal-panel:test'
Easy, right?
Defining custom commands
Each command is defined in the commands entry the following way:
"name": {
  "description": "Simple description shown in command view (activated by memdump or ?)",
  "command": ["command0", "command1", "command2"]
}
'command0', 'command1'... are the commands that will be invoked by the user entry.
Example involving g++ usage:
"build": {
  "description": "Build C/C++ application.",
  "command": [
    "echo Compiling %(file) using g++ Please wait...",
    "g++ \"%(file)\" -o \"%(file).runnable\"",
    "echo Compilation finished %(file)."
  ]
}
As you can see you are able to build the current C/C++ project using only a single command.
You may also try creating a build command accepting single file path (simple source file path) and
the auto_build command, which will execute build command with %(file) parameter.
E.g.
"build": {
  "description": "Build C/C++ application.",
  "command": [
    "echo Compiling %(0) using g++ Please wait...",
    "g++ %(0) -o %(0).runnable",
    "echo Compilation finished %(0)."
  ]
},
"auto_build": {
  "description": "Automatically build C/C++ application.",
  "command": [
    "build \"%(file)\""
  ]
}
Defining custom rules
The highlight rules that are placed in rules property can be defined using two methods.
The simple way looks like:
  "regexp" : {
    "css-property1": "css-value1",
    "css-property2": "css-value2",
    "css-property3": "css-value3"
  }
Or more complex (and also more powerful) way:
  "REGEXP" : {
    "match" : {
      "matchLine": true,
      "replace": "REPLACEMENT"
    },
    "css": {
      "color": "red",
      "font-weight": "bold"
    }
  }
The REGEXP will be replaced with REPLACEMENT and all the line with matched token will be colored to red(matchLine:true).
You can also override default regular expression flags (default are: gm):
"match": {
  "flags": [ "g", "i" ]
}
And specify how many lines under the match should be replaced:
"match": {
  "matchLine": true,
  "matchNextLines": "3"
}
This rule will be applied to the entire line with the match and the next 3 lines (below it).
Note that, the matchNextLines option can be used only with matchLine set to true, otherwise it's got no meaning.
Getting more from custom patterns
You can event make your patterns to be applied to the html code.
Adding the forced option to the match:
"match": {
  "forced": true
}
From now your pattern will be applied to the html code, so it may seriously broke entire terminal output! The forced patterns must be carefully designed to correctly manipulate the html code. If you're a beginner you should do most things without using forced patterns.
More about regex rules
You can use the following properties in regex matches:
matchLine- bool value specifies if the regex should be applied to the whole linematchNextLines- integer value specifies how many lines after the line containing current match should be also matchedreplace- text that the match will be replaced with
Special annotation
You can use special annotation (on commands/rules definitions or in settings - command prompt message/current file path replacement) which is really powerful:
- (R - can be used in the rules user definitions)
- (T - can be directly typed to the terminal)
- (A - can be used from the terminal API)
| Property name | Usage context | Description |
|---|---|---|
;; |
R/T/A | Divides the commands (commands divided by this will be executed separatly; one after another) |
%(dynamic) |
R/T/A | Indicates that the value should be dynamically updated. Usage example: echo %(raw) %(dynamic) <ANY CONTENT WITH VARIABLES> |
%(raw) |
R/T/A | Used to delay the variables expansion (the variables are expanded only at output - can be used with echo and %(dynamic) to create dynamic entries) |
%(project.root) |
R/T/A | Refers to the first currently opened project directory |
%(project.count) |
R/T/A | Refers to the number of the currently opened project directories |
%(project:[index]) |
R/T/A | Refers to the choosen currently opened project directory |
%(username) %(user) |
R/T/A | Refers to the currently logged user |
%(computer-name) %(hostname) |
R/T/A | Refers to the currently used computer's name |
%(home) |
R/T/A | Refers to the current user home directory (experimental) |
%(path) %(cwd) |
R/T/A | Refers to the current working directory path |
%(atom) |
R/T/A | Refers to the atom directory |
%(file) |
R/T/A | Refers to the current file - same as %(editor.file) |
%(editor.file) |
R/T/A | Refers to the file currently opened in the editor (full path) |
%(editor.path) |
R/T/A | Refers to the file currently opened in the editor (parent folder path) |
%(editor.name) |
R/T/A | Refers to the file currently opened in the editor (file name) |
%(line) |
T | Refers to the input command number (used for prompt styling) |
%(env.[property]) |
R/T/A | Refers to the node.js environmental variables - To get the list of all available system properties use %(env.*) (See node.js process_env) |
%(env.*) |
T | Refers to the list of all available environmental (native) properties (See node.js process_env) |
%(command) |
R/T/A | Refers to the lastly used command |
%(link) [path] %(endlink) |
R/T/A | Creates dynamic terminal file linkage with the given file path. |
%(day) |
R/T/A | Refers to the current system time (2-digit day number) |
%(month) |
R/T/A | Refers to the current system time (2-digit month number) |
%(year) |
R/T/A | Refers to the current system time (4-digit year number) |
%(hours) |
R/T/A | Refers to the current system time (2-digit 24-hour format number) |
%(minutes) |
R/T/A | Refers to the current system time (2-digit minutes number) |
%(seconds) |
R/T/A | Refers to the current system time (2-digit seconds number) |
%(milis) |
R/T/A | Refers to the current system time (2-digit miliseconds number) |
%(hours12) |
R/T/A | Refers to the current system time (2-digit 12-hour format number) |
%(ampm) %(AMPM) |
R/T/A | Refers to the am/pm /or AM/PM text (for 12-hour formats) |
%(.day) %(.month) %(.year) %(.hours) %(.minutes) %(.seconds) %(.milis) %(.hours12) |
R/T/A | Refers to the time variables, but always skips leading zeros |
%(^[formatter]) |
R/T/A | Text formatting modifiers. |
%(disc) |
R/T/A | Refers to the current working directory (disc name) |
%(path:[index]) |
R/T/A | Refers to the current working directory (access path breadcrumbs) |
%(tooltip:[displayed text]:content:[tooltip content]) |
R/T/A | Creates interactive tooltip (displayed text and tooltip content cannot contain any special characters) |
%(label:[type]:text:[text]) |
R/T/A | Creates interactive label (the text cannot caontain any spacial character) - the label types are: error, danger, warning, info, default, badge) |
%([index]) |
A | Refers to the parameters passed to the invoked command. |
%([index]) |
R | Refers to the regular expression catching group (group 0 is entire match) |
%(content) |
R | Refers to the entire match found by the regular expression. |
%(*) |
A | Refers to the all passed parameters. |
%(*^) |
A | Refers to the command string (all passed arguments with the command name at the beginning) |
%(^) |
R/T/A | Text formatting annotation (means end of the earlier used text modifier - each used modifier should have its own formatting end) |
%(^#[hex color]) |
R/T/A | Text formatting annotation (sets the colour of the text) |
%(^b) %(^bold) |
R/T/A | Text formatting annotation (makes the text bolded) |
%(^i) %(^italic) |
R/T/A | Text formatting annotation (creates text in italics) |
%(^u) %(^underline) |
R/T/A | Text formatting annotation (makes the text underlined) |
%(^l) or %(^line-through) |
R/T/A | Text formatting annotation (creates line through the text) |
A few words about indexing in variables.
The variable components are always indexed from 0, so %(path:0) refers to the first path component.
You can also reference last element of the path using negative values: %(path:-1) is last element, %(path:-2) the seconds last etc.
The same for referencing passed parameters - %(INDEX) and project directories - %(project:INDEX).
Text formatting
Please use the %(^...) modifiers to format the text:
%(^)- ends the text formatting%(^#000000)- colors the text with the hex color%(^b) or %(^bold)- creates bold text%(^i) or %(^italic)- creates text in italics%(^u) or %(^underline)- creates underlined text%(^l) or %(^line-through)- creates line trough the text
Example usage:
default %(^i)italics%(^) %(^u)underline%(^) %(^b)%(^i)bold italics%(^)%(^) %(^#DAA520)colored%(^)
Internally defined commands
You can take advantage of commands like memdump which prints information about all loaded commands (internal, not native!).
Here the list of all commands:
lsnew FILENAME- creates new empty file in current working directory and opens it instantly in editor viewedit FILENAME- opens a given file in editorlink FILENAME- creates new file link (you can use it to open a file)rm FILENAME- removes file in current working directorymemdumpor?- prints information about all loaded commandsclear- clears console outputcd- moves to a given pathupdate- reloads plugin config (terminal-commands.json)reload- reloads atom window
Included example commands:
compile- compiles current file using g++run- runs the previously compiled filetest FILENAME- runs the test on the compiled application FILENAME is a FILE0.in file and the compiled application name must be FILE.exe e.g.test test5.inmeanstest.exe < test5.in
Internal configuration
You can modify the extensions.less file and add your own extension colouring rules. E.g:
  .txt {
    color: hsl(185, 0.5, 0.5);
    font-weight: bold;
  }
  .js {
    color: red;
  }
Simple like making a cup of fresh coffee... Just dot, extension name and CSS formatting.
The ./config/terminal-style.less contains the general terminal stylesheet: E.g.
background-color: rgb(12, 12, 12);
color: red;
font-weight: bold;
You can modify it to make the terminal look cooler.
Creating more advanced custom functions (plugins)
The ./commands directory contains the plugins (you can add your own commands).
Each plugin exports a list of all custom commands (each plugin directory must contain index.coffee file - its entry point, which looks like described below)
E.g.
module.exports =
  "hello_world":
    "description": "Prints hello world message to the screen."
    "command": (state, args)->
      return "Hello world"
The state is the terminal view object and the args - the array of all passesd parameters.
Your custom functional command can also create console links using state.consoleLink path, labels using state.consoleLabel type, text or execute other commands:
E.g.
"call_another":
  "description": "This example shows how to call another command."
  "command": (state, args)->
    return state.exec "echo Hello world", state, args
But if you're using state.exec you must remember about passing not only command string but also state and args parameters (array of refernced parameters).
The array of the referenced parameters contains all parameters which will be referenced by a command string (element at zero index in array will be used for %(0) replacement). If the command string do not reference its parameters you can pass only a null value.
As you can see all terminal messages are displayed automatically (just return the string message). but you can also print them manually:
"hello_world":
  "description": "Hello world example with two messages."
  "command": (state, args)->
    state.message 'Hello world'
    return 'Second string hue hue :)'
You can specify the command description, example usage and if the plugin command is outdated - make it deprecated:
"hello_world":
  "deprecated": true
  "example": "hello_world"
  "params": "[NONE]"
  "description": "Hello world example with two messages."
  "command": (state, args)->
    state.message 'Hello world'
    return 'Second string hue hue :)'
You can also export new variables:
"name":
  "description": "My own variable!"
  "variable": (state) -> return "LOL"
In the given example the variable can be acessed by typing %(name).
More about console
As you can see in previous examples we were calling state.exec.
This method accepts tree parametes:
command, args_reference, state
command is the string command to be executed e.g. echo test or format C:
args_reference is the array containing all reference arguments e.g. if you passes a ['arg0', 'arg1'] as parameter the %(0) sequence will be replaced with arg0 text and %(1) with arg1. If this paramter is undefined or null the command is executed normally and the %(0) sequences are simply removed.
state - the console view object e.g. state.exec 'echo test > test.txt', null, state
You can also call other useful console methods:
state.message 'MESSAGE'- displays a message (can contains css/html formatting)state.rawMessage 'MESSAGE'- displays a message without parsing special sequences like%(link)...%(endlink)or%(cwd)etc.state.clear- clears console outputstate.consoleLink 'FILENAME'- creates console link to a given file (returns text which will be replaced with interactive file link)state.consoleLabel 'TYPE', 'TEXT'- creates console label just like%(label:TYPE:text:TEXT)
Hotkeys
shift-entertoggle current terminalcommand-shift-tnew terminalcommand-shift-jnext terminalcommand-shift-kprev terminal`- toggle terminalescape(in focused input box) - close terminal
TODO
- Make a more cool terminal cursor.
- More interactive stuff
- Maybe a little bash parser written in javascript?
- Some about stdinput (which is currently really bad)
Example configuration
Here it is, the example configuration (terminal-commands.json) - that you can see on the preview images.
To use it just copy it to your ./atom/terminal-commands.json file (if the file doesn't exist call update command and it should be created).
The regex rules preview can be easily checked by invoking echo command (e.g. echo warn test warning messages.).
Note that after each config update you must call update command otherwise changes will take no effects.
{
	"_comment": "Package atom-terminal-panel: This terminal-commands.json file was automatically generated by atom-terminal-package. It contains all useful config data.",
	"commands": {
		"hello_world": {
			"description": "Prints the hello world message to the terminal output.",
			"command": [
				"echo Hello world :D",
				"echo This is",
				"echo example usage",
				"echo of the console",
				"echo arg[0] = %(0)",
				"echo arg[1] = %(1)"
			]
		}
	},
	"actions": [
		["test", "hello_world"]
	],
	"toolbar": [
		[
			"foo",
			"bar",
			"Ecce est foo-bar exemplum!"
		],
		[
			"clear",
			"clear",
			"Clears the console output."
		],
		[
			"info",
			"info",
			"Prints the terminal welcome message."
		],
		[
			"all available commands",
			"memdump",
			"Displays all available builtin commands. (all commands except native)"
		]
	],
	"rules": {
		"\\b[A-Z][A-Z]+\\b": {
			"match": {
				"flags": [
					"g"
				]
			},
			"css": {
				"color": "gray"
			}
		},
		"(error|err):? (.*)": {
			"match": {
				"matchLine": true,
				"replace": "%(label:error:text:Error) %(0)"
			},
			"css": {
				"color": "red",
				"font-weight": "bold"
			}
		},
		"(warning|warn|alert):? (.*)": {
			"match": {
				"matchLine": true,
				"replace": "%(label:warning:text:Warning) %(0)"
			},
			"css": {
				"color": "yellow"
			}
		},
		"(note|info):? (.*)": {
			"match": {
				"matchLine": true,
				"replace": "%(label:info:text:Info) %(0)"
			},
			"css": {}
		},
		"(debug|dbg):? (.*)": {
			"match": {
				"matchLine": true,
				"replace": "%(label:default:text:Debug) %(0)"
			},
			"css": {
				"color": "gray"
			}
		}
	}
}
Experiments
This package is in alpha development phase. You can enable experimental features, which may be added to the software in incoming releases.