This package provides the following services:
This package consumes the following services:
Bosh Deployment Manifest Editor for Atom
This extension provides basic validation, content assist and hover infos for editing Bosh Deployment Manifest and Cloud Config Files.
It is recommended to use this extension package when atom-ide-ui atom extension package is installed. Thus, reconciling (error/warning markers) and hover support is fully functional.
Usage
The Bosh editor automatically activates when the name of the file you are editing is deployment.ymlor cloud-config.yml. Alternately, you can select the grammar for your file by doing these steps:
- Open the file, and it will most likely open with the default Atom YAML editor.
- In the bottom-right of the editor, click on YAML.
- This opens the Grammar Selection dialogue. Search and select
Bosh-Deployment-Manifestfor deployment files, orBosh-Cloud-Configfor Cloud Config files.
If you find an issue please raise it here: https://github.com/spring-projects/sts4/issues
Functionality
This extension provides validation, content assist and documentation hovers for editing Bosh Deployment Manifest files and Cloud Configs.
Validation
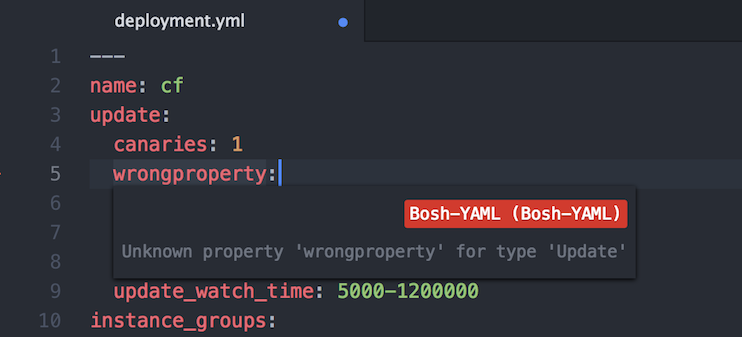
As you type the text is parsed and checked for basic syntactic and structural correctness. Hover over an error marker to see an explanation:

Content assist
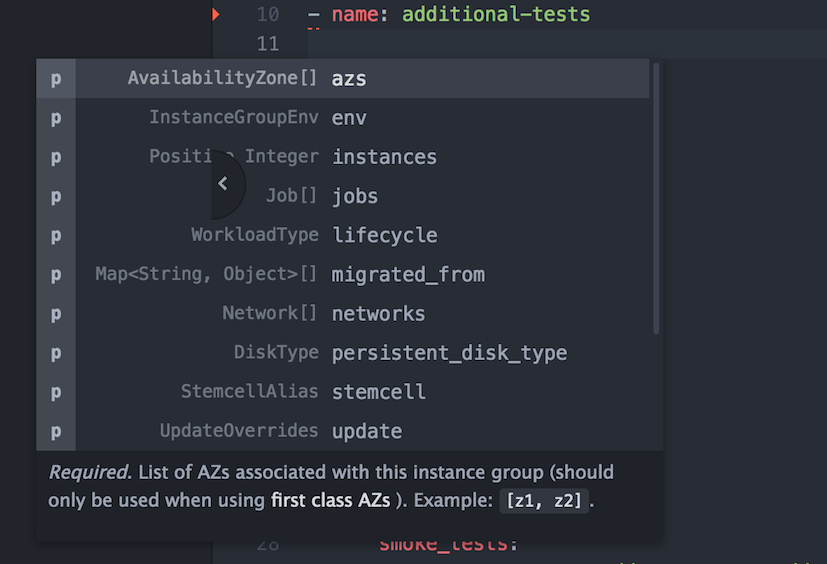
Having trouble remembering all the names of the attributes, and their spelling? Or can't remember the exact name/version of the stemcell you just uploaded to your bosh environment? Content assist to the rescue:


Documentation Hovers
Having trouble remembering exactly what the meaning of each attribute is? Hover over an attribute and read its detailed documentation:

Navigate to Symbol in File
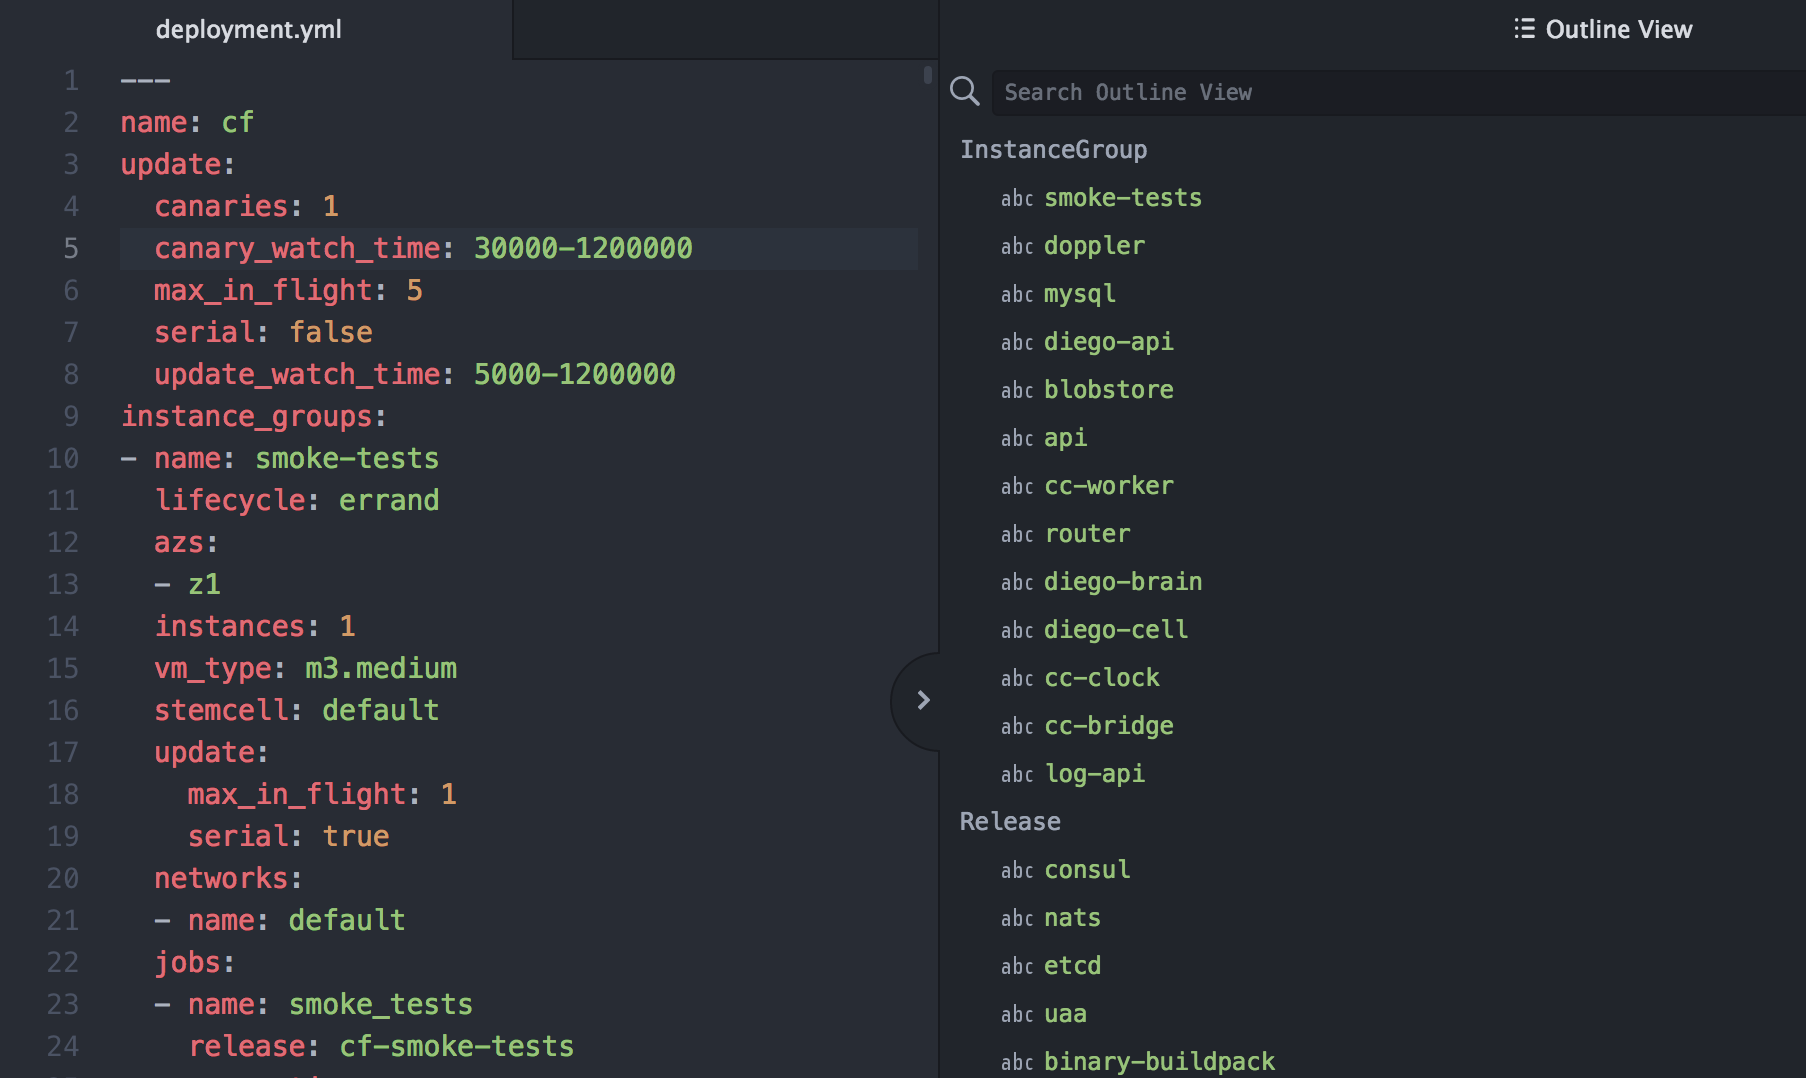
Is your deployment manifest file getting larger and it is becoming harder to find a particular Instance Group, Release, or Stemcell definition? The Atom Outline View (View -> Toggle Outline View) helps you quickly jump to a specific definition.

V2 versus V1 Schema
The editor is intended primarily to support editing manifests in the V2 schema. When you use attributes from the V1 schema the editor will detect this however and switch to 'V1 tolerance' mode.
In this mode, V1 properties are accepted but marked with deprecation warnings and V2 properties are marked as (unknown property) errors.
Targetting a specific Director
Some of the Validations and Content Assist depend on information dymanically retrieved from an active Bosh director. The editor retreives information by executing commands using the Bosh CLI. For this to work the CLI (V2 CLI is required) and editor have to be installed and configured correctly.
There are two ways to set things up to make this work:
Explicitly Configure the CLI:
From Atom, press CTRL-SHIFT-P and type config. Then enter or edit:
  "bosh-yaml":
    bosh:
      cli:
        # Path to an executable to launch the bosh cli V2. A V2 cli is required!
        # Set this to null to completely disable all editor features that require access to the bosh director
        command: "bosh"
        # Specifies the director/environment to target when executing bosh cli commands.
        # I.e. this value is passed to the CLI via `-e` parameter.
        target: "mytarget"
        # Number of seconds before CLI commands are terminated with a timeout
        timeout: 3
The Bosh CLI is configured by specifying these keys as shown above: command, target, and timeout. The comments in the example above describe what
each key does.
Note that these key settings do not allow you to provide credentials to connect to the director.
The editor assumes that you are providing the credentials implicitly by using the bosh login command from a terminal.
The Bosh CLI will persist the credentials in ~/.bosh/config and read them from there. A typical sequence of commands to store the credentials would be something like the following:
First, create an alias for your environment:
$ bosh alias-env my-env -e 10.194.4.35 --ca-cert <(bosh int ./creds.yml --path /director_ssl/ca)
Using environment '10.194.4.35' as anonymous user
...
Succeeded
$
Second, obtain username/password for your director. For example:
$ bosh int ./creds.yml --path /admin_password
very-secret-admin-password

Succeeded
Now use bosh login to establish a session and store the credentials:
$ bosh login -e my-env
Username (): admin
Password (): very-secret-admin-password

Using environment '10.194.4.35' as client 'admin'

Logged in to '10.194.4.35'

Succeeded
You can verify that CLI is setup correctly by executing a command like:
$ bosh -e my-env cloud-config
...
Succeeded
Implictly Configure the CLI:
If the Bosh CLI is not explicitly configured, the editor will, by default, try to execute commands like bosh cloud-config --json
and bosh stemcells --json without an explicit -e ... argument. This works only if you ensure that the editor
process executes with a proper set of OS environment variables:
PATH: must be set so thatboshcli executable can be found and refers to the V2 CLI.BOSH_ENVIRONMENT: must be set to point to the bosh director you want to target.
If you start Atom from a terminal, you can verify that things are setup correctly by executing command:
bosh cloud-config
If that command executes without any errors and returns the cloud-config you expected, then things are setup correctly. If you subsequently launch Atom from that same terminal the dynamic CA and linting should work correctly.
Releases:
Released versions of this package can be installed directly from the Atom package installer.
There are also development snapshots available with the latest fixes and improvements from release git repository: https://github.com/spring-projects/atom-bosh
- Clone the release repository for Atom package if not already cloned and navigate to
atom-boshfolder - Run
git clean -fxd- necessary to delete out of date LS JAR file and dependency packages - Run
git pull- get the latest changes - Run
npm install- Install latest dependecnies and download proper LS JAR - Run
apm link .- Link the package to Atom - Either start Atom or Reload Window in Atom