An xterm based plugin for providing terminals inside your workspace. Originally for Atom, updated for Pulsar. A fork of atom-xterm and x-terminal
This package provides the following services:
        ██╗  ██╗  ████████╗███████╗██████╗ ███╗   ███╗██╗███╗   ██╗ █████╗ ██╗
        ╚██╗██╔╝  ╚══██╔══╝██╔════╝██╔══██╗████╗ ████║██║████╗  ██║██╔══██╗██║
         ╚███╔╝█████╗██║   █████╗  ██████╔╝██╔████╔██║██║██╔██╗ ██║███████║██║
         ██╔██╗╚════╝██║   ██╔══╝  ██╔══██╗██║╚██╔╝██║██║██║╚██╗██║██╔══██║██║
        ██╔╝ ██╗     ██║   ███████╗██║  ██║██║ ╚═╝ ██║██║██║ ╚████║██║  ██║███████╗
        ╚═╝  ╚═╝     ╚═╝   ╚══════╝╚═╝  ╚═╝╚═╝     ╚═╝╚═╝╚═╝  ╚═══╝╚═╝  ╚═╝╚══════╝
        ██████╗ ███████╗██╗      ██████╗  █████╗ ██████╗ ███████╗██████╗
        ██╔══██╗██╔════╝██║     ██╔═══██╗██╔══██╗██╔══██╗██╔════╝██╔══██╗
        ██████╔╝█████╗  ██║     ██║   ██║███████║██║  ██║█████╗  ██║  ██║
        ██╔══██╗██╔══╝  ██║     ██║   ██║██╔══██║██║  ██║██╔══╝  ██║  ██║
        ██║  ██║███████╗███████╗╚██████╔╝██║  ██║██████╔╝███████╗██████╔╝
        ╚═╝  ╚═╝╚══════╝╚══════╝ ╚═════╝ ╚═╝  ╚═╝╚═════╝ ╚══════╝╚═════╝


)
)
An xterm based for providing terminals inside your workspace! ❤️
A fork of atom-xterm and x-terminal
Pulsar Built-in Terminal
Eventually, I'd like to transition this over to the Pulsar repo, however as of right now I'll maintain it separately because there's a lot on our plates over there.
Installation
There are 3 ways to install this package:
- Navigate to https://web.pulsar-edit.dev/packages/x-terminal-reloaded and click install.
- Open Pulsar, open Settings (Ctrl + Shift + Comma), click on Install, search for
x-terminal-reloaded - Install via CLI.
pulsar --package install x-terminal-reloadedorpulsar -p install x-terminal-reloaded
Note:
Due to native module requirements, you may need the C++ toolchain (Windows, mac, linux) and Python 3.10.
Node-pty, which is used for terminal emulation, is a native module and may need to be built for your specific system. Provided you have the tooling listed above, Pulsar will do this for you automatically.
Opening Terminals
To open terminals, you can open them through the menu or through the available key bindings.
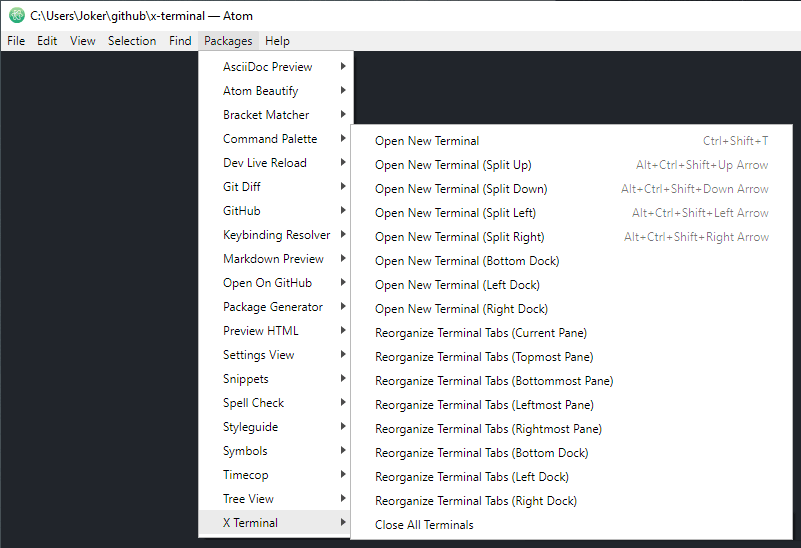
See the available key bindings for the x-terminal package.
There's also menu items available for opening terminals via right clicking on a text editor or on a terminal.
Finally, terminal tabs are automatically reopened at the spot you placed them when you last exited Pulsar.
Active Terminal
The active terminal is the terminal that will be used when sending commands to
the terminal with commands like x-terminal:insert-selected-text and
x-terminal:run-selected-text
The active terminal will, by default, have an asterisk (*) in front of the title.
By default when a terminal is hidden it becomes inactive and the last used
visible terminal will become active. If there are no visible terminals none are
active.
The Allow Hidden Terminal To Stay Active setting will change the
default behavior and keep a terminal that is hidden active until another
terminal is focused.
Organizing Terminals
To quickly organize your terminal tabs, simply use the main menu. You can also find menu items by right-clicking on a terminal to organize your terminals.
And of course, there's the old fashion way of just moving the tabs where you want them. Feel free to place your terminal tabs anywhere in your workspace to include any of the docks.
Profiles
The x-terminal package supports saving and loading profiles. What this allows you to do is save commonly used commands and settings for later use.
Notifications
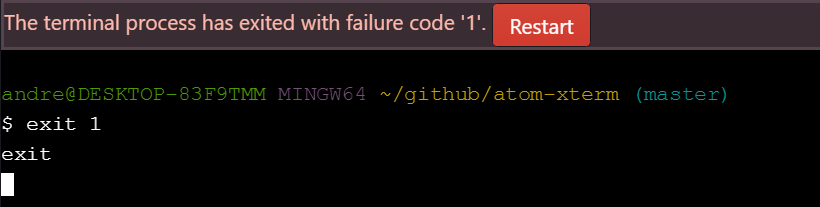
The x-terminal package provides notifications about terminal process exit successes and failures. Notifications will appear in Pulsar's own notification manager as well as on the terminal tab triggering the notification.
Success

Failure
There are also activity notifications for terminal tabs not in focus.

Services
For package writers, the x-terminal package supports three services, terminal, atom-xterm, and platformioIDETerminal, which
can be used to easily open terminals. These methods are provided using Pulsar's services
API.
To use a service, add a consumer method to consume the service, or rather a JavaScript object that provides methods to open terminals and run commands.
'terminal' service v1.0.0
The terminal service provides an object with updateProcessEnv, run, getTerminalViews, and open methods.
As an example on how to use the provided run() method, your
package.json should have the following.
{
  "consumedServices": {
    "terminal": {
      "versions": {
        "^1.0.0": "consumeTerminalService"
      }
    }
  }
}
Your package's main module should then define a consumeTerminalService
method, for example.
import { Disposable } from 'atom'

export default {
  terminalService: null,

  consumeTerminalService (terminalService) {
    this.terminalService = terminalService
    return new Disposable(() => {
      this.terminalService = null
    })
  },

  // . . .
}
Once the service is consumed, use the run() method that is provided
by the service, for example.
// Launch `somecommand --foo --bar --baz` in a terminal.
this.terminalService.run([
   'somecommand --foo --bar --baz'
])
'atom-xterm' service v2.0.0
The atom-xterm service provides the
openTerminal() method. The openTerminal() method behaves just like Pulsar's
open()
method except that the first argument must be a JSON object describing the
terminal profile that should be opened. Docs about this JSON object can be
found here.
As an example on how to use the provided openTerminal() method, your
package.json should have the following.
{
  "consumedServices": {
    "atom-xterm": {
      "versions": {
        "^2.0.0": "consumeAtomXtermService"
      }
    }
  }
}
Your package's main module should then define a consumeAtomXtermService
method, for example.
import { Disposable } from 'atom'

export default {
  atomXtermService: null,

  consumeAtomXtermService (atomXtermService) {
    this.atomXtermService = atomXtermService
    return new Disposable(() => {
      this.atomXtermService = null
    })
  },

  // . . .
}
Once the service is consumed, use the openTerminal() method that is provided
by the service, for example.
// Launch `somecommand --foo --bar --baz` in a terminal.
this.atomXtermService.openTerminal({
  command: 'somecommand',
  args: [
    '--foo',
    '--bar',
    '--baz'
  ]
})
'platformioIDETerminal' service v1.1.0
The platformioIDETerminal service provides an object with updateProcessEnv, run, getTerminalViews, and open methods.
As an example on how to use the provided run() method, your
package.json should have the following.
{
  "consumedServices": {
    "platformioIDETerminal": {
      "versions": {
        "^1.1.0": "consumePlatformioIDETerminalService"
      }
    }
  }
}
Your package's main module should then define a consumePlatformioIDETerminalService
method, for example.
import { Disposable } from 'atom'

export default {
  platformioIDETerminalService: null,

  consumePlatformioIDETerminalService (platformioIDETerminalService) {
    this.platformioIDETerminalService = platformioIDETerminalService
    return new Disposable(() => {
      this.platformioIDETerminalService = null
    })
  },

  // . . .
}
Once the service is consumed, use the run() method that is provided
by the service, for example.
// Launch `somecommand --foo --bar --baz` in a terminal.
this.platformioIDETerminalService.run([
   'somecommand --foo --bar --baz'
])
Development
Want to help develop x-terminal? Here's how to quickly get setup.
First clone the x-terminal-reloaded repo. This step does not need to be done with pulsar --package, if you already have an existing clone.
pulsar --package develop x-terminal
This should clone the x-terminal-reloaded package into the $HOME/github/x-terminal
directory. Go into this directory (or your pre-existing directory) and install its dependencies.
cd $HOME/github/x-terminal
npm install
~You shouldn't need to rebuild any node-pty since they are pre-compiled, however in the event they aren't available, you can rebuild them with:~
You will probably need to rebuild node-pty as Pulsar's current electron version is no longer LTS. Please do so with the following:
pulsar --package rebuild
Finally, open this directory in Pulsar's dev mode and hack away.
pulsar --dev
There's a test suite available for automated testing of the x-terminal package.
Simply go to View > Developer > Run Package Specs in Pulsar's main menu or
use the hotkey. You can run the full test suite (which includes running lint
tools) via command-line by running npm run test inside the x-terminal
directory.
Various lint tools are being used to keep the code "beautified". To run only
the lint tools, simply run npm run lint.
Pull Requests
Whenever you're ready to submit a pull request, be sure to submit it
against a fork of the main x-terminal repo
master branch that you'll own. Fork the repo using Github and make note of the
new git URL. Set this new git URL as the URL for the origin remote in your
already cloned git repo is follows. You can also validate it with git remote --verbose
git remote set-url upstream "https://github.com/Spiker985/x-terminal-reloaded.git"
git remote set-url origin ${NEW_GIT_URL}
Ensure your new changes passes the test suite by running npm run test.
Afterwards, push your changes to your repo and then use Github to submit a new
pull request.
xterm.js
The terminals that users interact with in this package is made possible with major help from the xterm.js library. As such, often times it's necessary to make changes to xterm.js in order to fix some bug or implement new features.
If you want to work on xterm.js for the benefit of a bug fix or feature to be supported in x-terminal, here's how you can quickly get setup.
First make a fork of xterm.js. Next, clone your newly created fork as follows.
git clone ${YOUR_XTERMJS_FORK} ${HOME}/github/xterm.js
Go into your newly cloned repo for xterm.js.
cd ${HOME}/github/xterm.js
Install all needed dependencies.
npm install
Build xterm.js.
npm run build
Ensure the test suite passes.
npm run test
npm run lint
Add a global link for xterm.js to your system.
npm link
Inside your x-terminal directory, link against the global xterm link.
cd ${HOME}/github/x-terminal
npm link xterm
Finally, perform a rebuild using pulsar inside the x-terminal directory.
pulsar --package rebuild
You're all set for developing xterm.js. Hack away in your xterm.js directory,
run npm run build, then reload your Pulsar window to see the changes to your
terminals.
Credits and Legal
Click for copyright and license info about this package.
![]()
Feedback
Need to submit a bug report? Have a new feature you want to see implemented in x-terminal? Please feel free to submit them through the appropriate issue template.
For bug reports, please provide images or demos showing your issues if you can.